 Skip to content

The carnage inflicted by COVID-19 goes well beyond filled hospital beds, or the interruptions in the lifestyles we humans hold so dear. All told, global vehicle production was down a whopping 20% across the board in 2020. Fractured supply chains, low customer demand, shaky economies, and poorly orchestrated solutions all made for one hell of a rough year for automakers.
But long before the COVID-19 shit-storm, another kind of infliction was eating away at the automotive industry, and there is no vaccine for this disease. For many, peeling clear coat appears to be little more than an unsightly surface blemish. A “skin-deep” affliction brought on by harmful UV rays, acids contained within bird turds and bug splatter, and the harmful side effects of acid rain.
If left unprotected, a factory-applied clear coating can begin to deteriorate within as little as just a few months, allowing ample room for all manner of contaminant to eat into the paint underneath. So while a clear coat’s job is to protect the base coat of paint from direct exposure to the elements, allowing this sacrificial lamb to be slaughtered is both foolish and financially irresponsible.
But even with great care, and a protective roof overhead, no vehicle is safe from clear coat damage, which leads one to ponder a series of questions.
Is a DIY approach even an option in this sort of scenario? Or is attempting to fix damaged clear coat something best left to the pros? And if you can fix a compromised clear coat on one’s own, what all is required in regard to supplies and repair techniques?
Today, we’ll answer these questions, and explain a few facts about clear coats that correlate to how they work, types of damage they are susceptible to, and the most effective DIY methods for repairing a peeling clear coat on one’s own.
Breaking Down the Facts About Automotive Clear Coatings

From an ingredients standpoint, automotive clear coat is almost completely identical to pigmented paint, because the only thing missing, is, well… pigment. All of the same solvents, fillers, resins, additives, hardeners, and so on are all still present, which means most modern clear coats are little more than a transparent urethane “topping.” Acrylic enamels, on the other hand, are what you will find on vintage painted vehicles, which do not require a hardener to function, but are far more susceptible to wear-and-tear.
Speaking of wear-and-tear, there’s a common misconception that all clear coats rely upon polymers for protection against UV rays and airborne contaminants. This is both true and false.
While polymers do help prevent harmful elements from penetrating the pigmented base coat paint underneath, it tends to take one hell of a beating in the process. If clear coat is the epidermis of an automobile, then the paint and the primer underneath is the hypodermis, with the bare metal and plastic beneath it all being tissue and bone.
Much like the human body, extended exposure to harmful UV rays, blunt impacts, sharp scratches, and corrosive chemicals will eventually cause the clear coat to fail. There’s a reason why we slap-on sunblock, strap-on a helmet, and stuff gloves on our hands, and the same goes for our car’s clear coats. Waxing, sealants, paint protection films (PPF), vinyl wraps, and our personal favorite, ceramic coatings, all serve as a form of protection for your vehicle’s painted panels. But what happens when this “automotive armor” doesn’t cut the kimchi, and the clear coat underneath gets damaged?
Quick Nerd Note: Clear coat not only provide protection to the car’s paint, but they also make repairs and maintenance far easier. These colorless paints also add gloss and depth to the car’s finish, and are available in a wide array of sheens and strengths.
What Happens When a Clear Coat Becomes Damaged?

Oh-Shit… Scratches
Modern automotive clear coatings may be more resilient than ever, but they are still far from invincible. While these colorless coatings do indeed help reduce the risk of things like oxidation from forming, they are prone to scratching, and therefore require occasional paint correction.
But paint correction contains its own risks as well, for those polishing/cutting compounds can damage the clear coat faster than you can say, “Please pass the penicillin.” So be wary when attempting to repair an automotive paint scratch on your own, because if you aren’t careful, you may do more harm than good.

Feeling a Bit… Faded?
Clear coats are also susceptible to fade, which oftentimes is the direct result of extended amounts of exposure to direct sunlight, and the implementation of improper car cleaning methods. Not only does the use of pH-heavy products like dish soap eat-up a clear coat faster than a tiny Japanese dude at a hot dog eating competition, but surface contaminants also make their oxidizing mark.
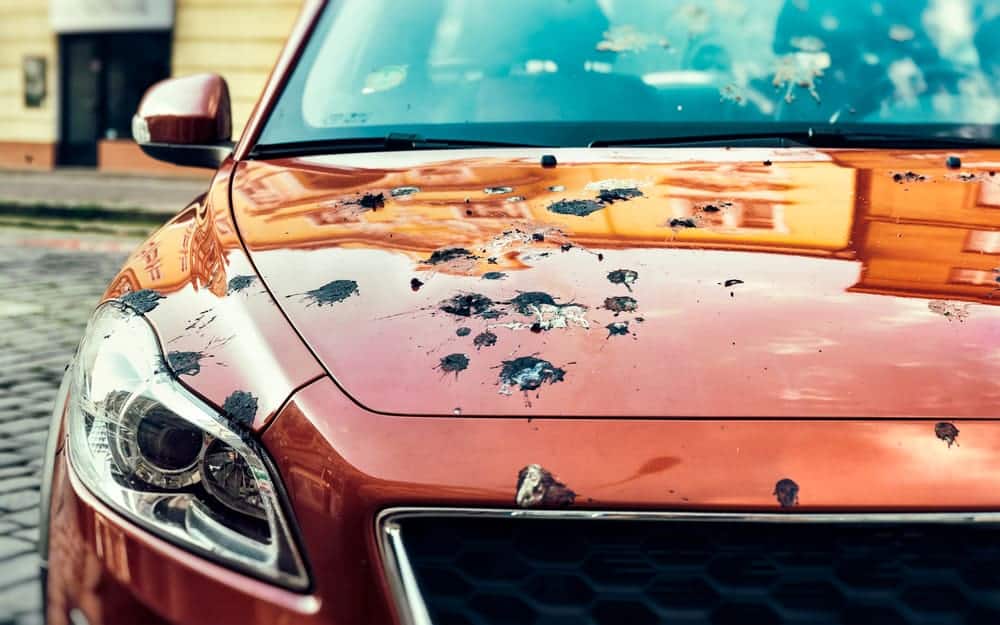
Everything from organic animal excrement and tree resin, to man-made chemicals and airborne pollution are quick to fuck-up a perfectly good clear coat. When this oxidation occurs, the finish will become foggy, or faded, causing the paint underneath to appear dull.
Quick Nerd Note: The areas most prone to scratch damage include the roof, hood, doors, and front-end of the vehicle, including the bumper, grille, and fenders.
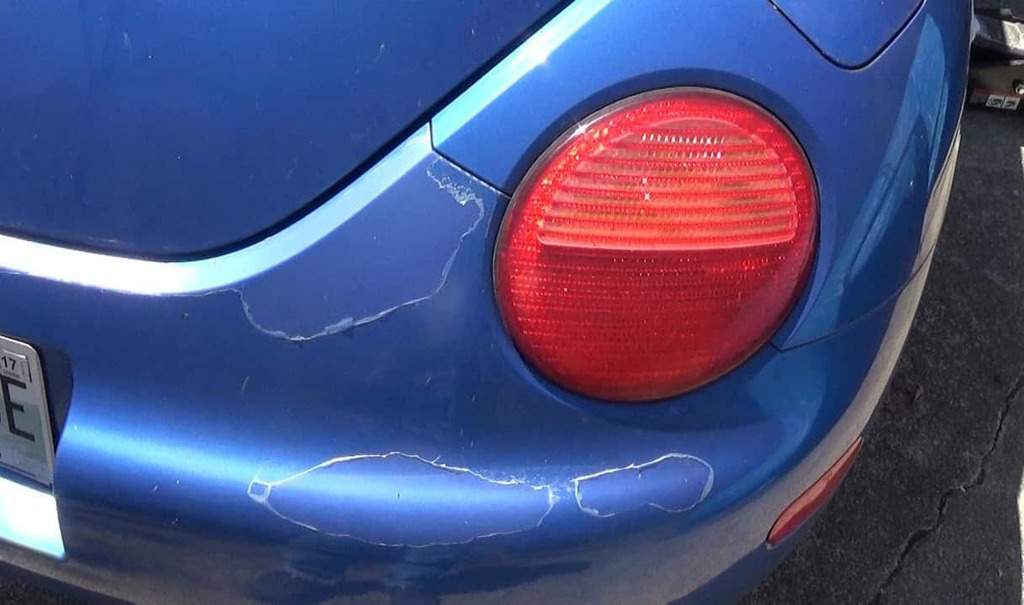
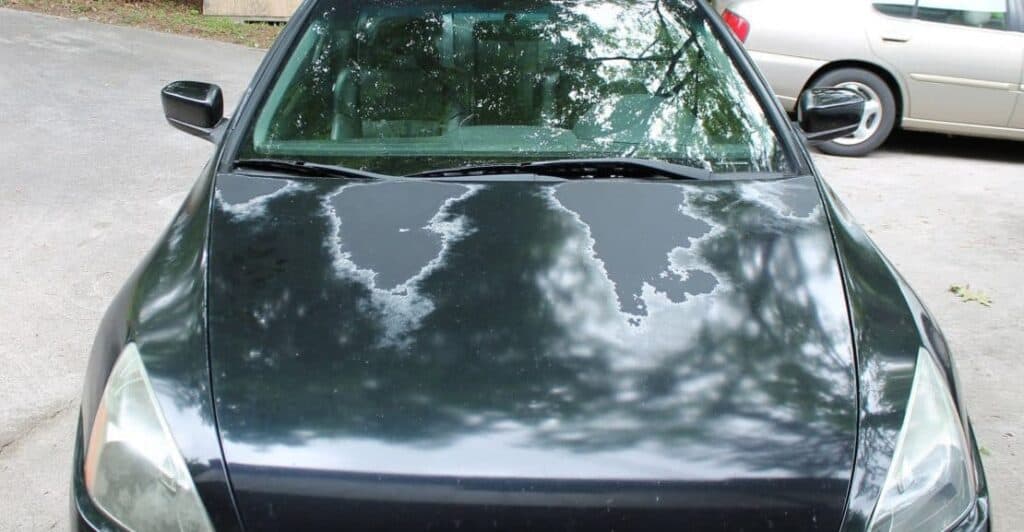
What Causes Clear Coat Peeling?

When a car’s clear coat begins to peel, the majority of the time it is due to piss-poor automotive detailing routines (or none whatsoever), exposure to the elements, and contact with harsh chemicals and cleaning agents. While there are numerous other causes of clear coat peel, the following three offenders are the most common causes behind peeling paint jobs.
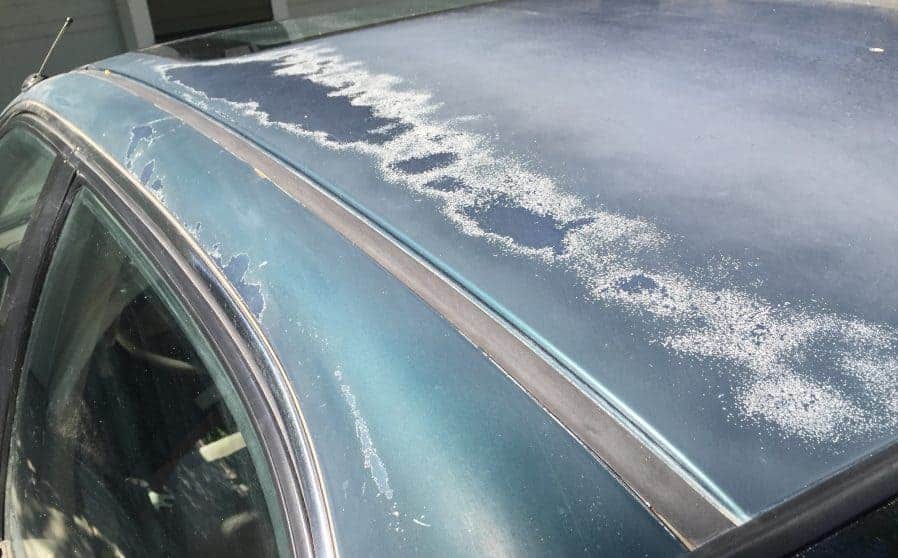
1. Extreme Weather

Photo Credit: Milwaukee Journal Sentinel/Facebook
Clear coat peeling is oftentimes the direct result of extended exposure to extreme weather, especially when a wintry mix is the primary suspect. Extreme cold has been known to cause older clear coats to become brittle, while straight-line wintry winds are notorious for slinging all manner of abrasive debris up against body panels. Meanwhile, corrosion comes into the equation courtesy of road salt, while hale, sleet, and various other forms of unpleasant precipitation adhere to surfaces. Try and scrape them off, and ZINGO! you’ve just scratched and peeled away a fat slice of that oh-so crucial automotive clear coat.
2. UV Rays

Oxidation, which oftentimes leads to peeling clear coat, is typically the direct result of prolonged periods of exposure to UV rays. As these harmful rays from our sun begin to penetrate the clear coat, the protective layer begins to harden, or dry-out, and then as it lifts from the surface, it gradually begins to flake away. On the bright side, if caught early enough, oxidation can be halted and reversed, thus preventing potential damage from occurring to the pigmented undercoatings underneath.
3. Harsh Chemicals and Household Cleaners

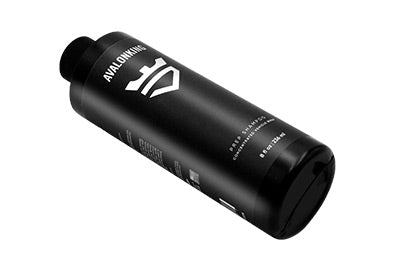
The final attack on car clear coats, is probably the most easily avoidable. Harsh cleaning chemicals and ordinary household cleaners are the bane of any automotive clear coat. For as resilient as a clear coat may be, they are quick to succumb to scrubbing and disinfecting products with crazy high pH levels, as well as alkaline-rich chemicals. There’s a really good reason why automotive specific shampoos were invented, and why millions of car detailing professionals rely upon these products every single day.
Quick Nerd Note: Most automakers treat their clear coat formulas like closely guarded tabloid secrets. This means that body shops only have the ability to “match” the coating, and have no way of replicating it. However, being that most people cannot tell the difference, and only give a shit about the finish, this discrepancy very rarely becomes a concern.
How to Repair a Car With Peeling Clear Coat
If the clear coat appears to require more than just a dash of polishing compound and paint correction, most people will hang up their DIY gloves, and turn toward a collision repair specialist. Repairing or replacing this transparent protective paint layer on one’s own typically requires quite a bit of care and some form of familiarity with the subject.
Fortunately, there are a handful of straightforward DIY steps that can be taken prior to throwing-in the proverbial microfiber towel, and phoning the local paint repair job. While there surely are countless other preferred methods and materials used by professionals and DIYers alike, the following five clear coat repair steps are the widely accepted norm for most “rattle can” clear coat fixes.
Step 1: Clean the Impacted Area

Before beginning any fix, it is always advisable to thoroughly clean the damaged area in question. Just because you will be removing the top layer of the clear coat, doesn’t mean that you can skimp on the whole “disinfect and inspect” stage. Any number of underlying issue could be lurking beneath a layer of grime or road salt. Exposing these issues prior to getting started will help prevent you having to go back in and fix these maladies down the line.
Visually inspecting and determining the extent of damage is but one of the benefits to cleaning prep. Contaminants are forever quick to embed in clear coats and pigmented layers of paint. This oftentimes will lead to oxidation, which is precisely what you are trying to eliminate and/or avoid in the first place.
Washing the entire body panel or section of the vehicle in question is a good idea too. Don’t just scrub the area where the clear coat is beginning to pull-back from the hood. Be thorough, and wash the whole damn hood. The best way to accomplish this is by using the two-buckets-and-a-beer car washing technique. This time-proven approach relies upon a bucket of freshwater for rinsing after each scrub, and a separate bucket of water that’s been spiked with a pH neutral automotive shampoo.
As for the beer, it’s sole purpose is to provide “moral support” and refreshment. So sip and enjoy, as you wick away any remaining moisture with a fluffy microfiber towel.
Step 2: Inspect the Damage

Next up, conduct a detailed inspection of the paint damage. If the clear coat is showing signs of peeling, then paint correction via the use of a polishing/cutting compound is probably out of the question. Any damage that goes beyond oxidation typically requires removing the top layer of clear coat with sandpaper. This will be an extremely labor intensive, progressive process, as removal is oftentimes completed via the use of sandpaper ranging in grit from 800 to 2,000 as it gets progressively milder.
Step 3: Protect Thy Vehicle… and Thyself
Photo Credit: Micah Wright
Before you begin removing the clear coat, you will need to protect your vehicle and yourself. The dust that gets kicked-up by the sandpapering process gets everywhere, and being that it tends to be highly abrasive, additional steps will need to be taken in order to prevent it from being ground into other areas.
To protect the more pristine surrounding areas, applying painters tape and newspaper, or swaths of painter’s masking paper will be necessary. Just tape off the sections around the compromised clear coat, and don’t forget to slap on a dust mask to ensure that you don’t inhale any of the dust from the scrubbing session that ensues. The same goes for when it comes time to spray the clear coat, as a professional grade respirator will both protect your lungs, and prevent any “cloudy-headed” mishaps from occurring.
Step 4: Remove That Crappy Old Clear Coat

The issue with correctly removing spot-damaged clear coat, is that for as simple as it sounds, the sanding process tends to be a painstakingly technical, tedious task. A solid understanding of paint conditions, sandpaper grit progression, and appropriate levels of applied force all must be weighed. This is the stage of clear coat correction where most people will fuck-up and be forced to phone a friend, family member, or local body repair shop for assistance.

To cut down on this risk of royally ruining your paint job, turn toward a mid- to low-grade “Scotch-Brite Hand Pad” for assistance instead. These synthetic, Silicon Carbide Mineral based scouring pads are an outstanding low-pressure alternative to sandpaper, and are known for being far more forgiving, all while producing a superior finish.
Simply use the Scotch-Brite pad to scuff off any larger flakes or peeling, and then gradually begin removing the top layer of damaged clear coat, starting with the edges, and moving toward the center. Compromised clear coat safely removed, use a microfiber cloth you don’t give a crap about to remove any dust or contaminants lingering around the area.
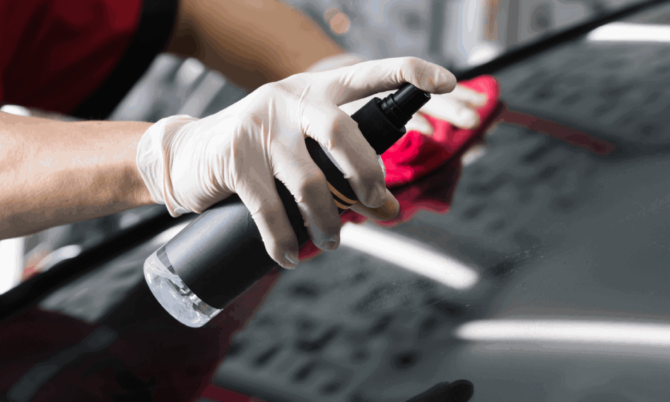
Step 5: Spray Some Fresh Clear Coat

Once the damaged clear coat in question has been removed, wipe all of the surfaces you plan on clear coating with a properly mixed isopropyl alcohol (IPA) blend. This will help guarantee that the area that’s about to get sprayed in clear coat is completely devoid of foreign contaminants and debris.
Once wiped and dried, you will need to apply three (3) layers of clear coat. Blended clear coatings that incorporate a specialized hardening agent will help cut application and curing times, and can be found both online and in most professional paint supply stores. Many of these products also tend to be scratch resistant and will outlast traditional clear coats. While traditional applications required the use of expensive auto paint application tools, brands like Spray Max and Rust-Oleum have made clear coat touch-up work a cinch thanks to the invention of rapid-drying aerosol applications.
For “rattle-can” applications, follow these steps:
- Shake the can well for at least one (1) minute.
- Remove the activator and install it on the bottom of the can (if you’re using an all-in-one blended clear coat and hardener, keep shaking for another two (2) minutes.
- Apply the first coat and allow it to dry.
- Complete this step three (3) times, following the suggested wait times between coatings.
- Once the clear coat has been sprayed, wait a minimum of two hours before removing the masking tape and/or paper.
- Wait at least 48 hours before proceeding to the final finishing step.
Step 6: Blend the Old With the New

Assuming you just completed a single section and not an entire panel, blending the freshly sprayed clear coat with the older coating will be the final procedure.
This step requires the use of a variable speed polisher or rotary buffer, along with various microfiber buffing pads, and both medium and mild grade cutting compounds. By carefully moving the polisher in the direction that will blend the older clear coat into the new coating, you will be able to blur the lines between the two, and not damage the fresh coating. Once blended to the point where the difference between old and new clear coats becomes indistinguishable, towel everything off once more with a microfiber cloth, and stand back to admire your handiwork.
Quick Nerd Note: Traditionally, the method of wet-sanding with super fine sandpaper would be utilized at this point, a technique that allows far greater levels of control, but suffers in the time management department.
How to Reduce the Risk of Clear Coat Peeling

By this point it should be obvious that repairing peeling or damaged clear coats is a royal pain in the ass. DIY clear coat repair work is also one of those fixes that runs the risk of turning into a hot mess if tackled by inexperienced hands. We’re talking extreme levels of haggardly hot mess here folks. A drunk uncle on a weekend bender in Reno with entirely too much cash sort of hot mess.
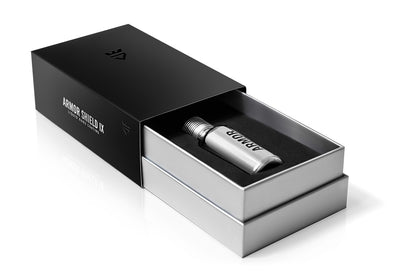
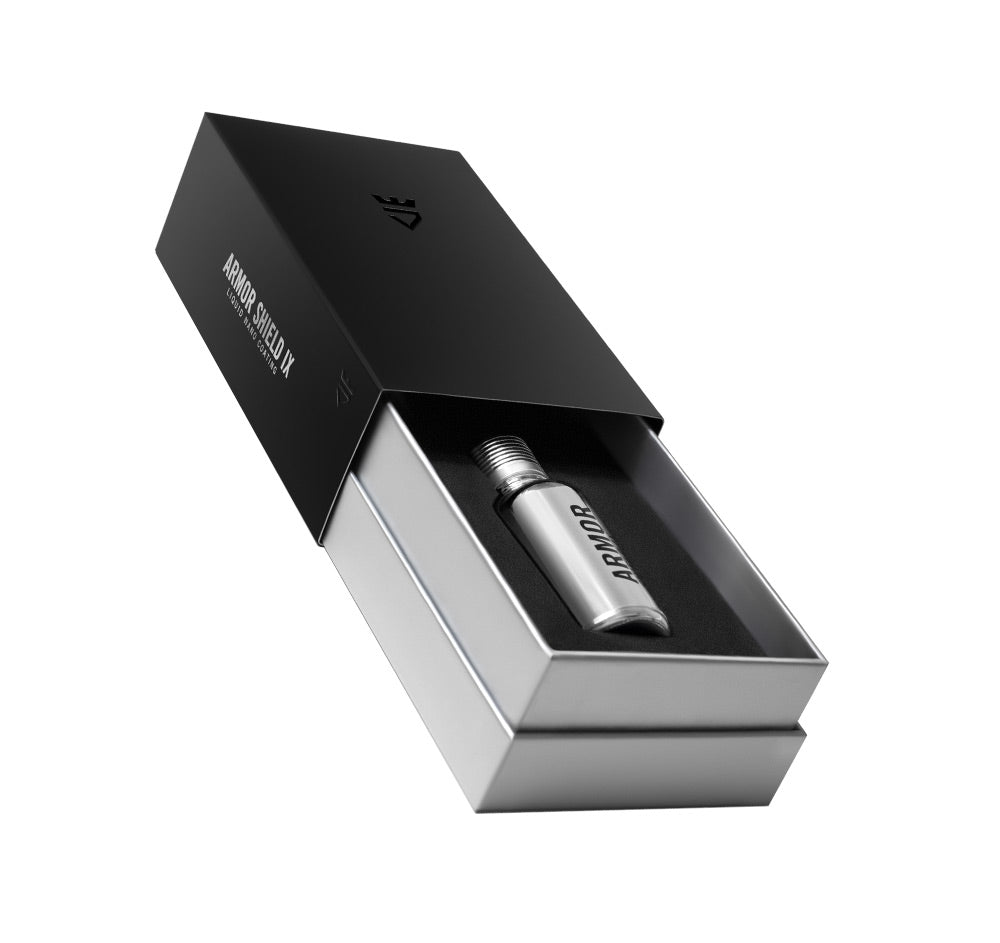
In order to reduce the potential risk of clear coat damage happening again (or to protect their new car’s crystal clear shine), more and more people have begun applying 9H-rated nano ceramic coating to their vehicle’s exterior.
A high-quality DIY ceramic coating like Armor Shield IX, will provide an ultra-thin, exceptionally strong layer of protection to virtually any hard surface. Clear coats, paint, carbon fiber, aluminum, chrome, plastic, polycarbonate headlights, that bulging phallic hood ornament… if it’s a hard surface, chances are a ceramic coating can protect it.
Parting Shots
For as useful as they may be, and for as resilient as they may seem, automotive clear coatings are far more frail and finnicky than most people think. This is one of the primary reasons why so many people have begun to turn toward nano ceramic coatings for protection and peace of mind.
When properly applied to a clean surface, and then routinely maintained, a 9H-rated ceramic coating will protect a healthy clear coat for anywhere from 2 to 5 years. No more worrying about birds, beasts, trees, or the elements shitting on your car’s clear coat. Just lustrous levels of shine, and unrivaled armor enhancements for that automobile’s transparent epidermis.
So go ahead and skip all of those horrid hours of paint correction and attempted clear coat removal and repair regrets. Taking a proactive approach, and applying a DIY ceramic coating is the clear answer when it comes to protecting your vehicle’s paint, and therefore the only question is: What’s holding you back?
5 comments
bill jarvis
i am just finishing my auto repair job…..(plastic bumper cover) now what? mcguires cutting compound …then a wax job ….followed by your product or what do you suggest. if my clearcoat goes on correctly, i would prefer not to sand. thanks in advance for any help
i am just finishing my auto repair job…..(plastic bumper cover) now what? mcguires cutting compound …then a wax job ….followed by your product or what do you suggest. if my clearcoat goes on correctly, i would prefer not to sand. thanks in advance for any help
Dale Pearl
Hi Christopher!
Armor Shield is only available through our website: once on Avalonking.com click on ’Get Started": https://test3.unicorns.rocks/shop/ceramic-coating/armor-shield-ix-diy-kit/
Hi Christopher!
Armor Shield is only available through our website: once on Avalonking.com click on ’Get Started": https://test3.unicorns.rocks/shop/ceramic-coating/armor-shield-ix-diy-kit/
Christopher Gomez
How to order this item
How to order this item
Sam Gibson
Just Brilliant!! Thank You so much.
Just Brilliant!! Thank You so much.
John Cruger
When I sprayed the clear coat, it did not fill in the peeled areas on my silver truck. All the viseos show the areas filling in. What’s up?
When I sprayed the clear coat, it did not fill in the peeled areas on my silver truck. All the viseos show the areas filling in. What’s up?