
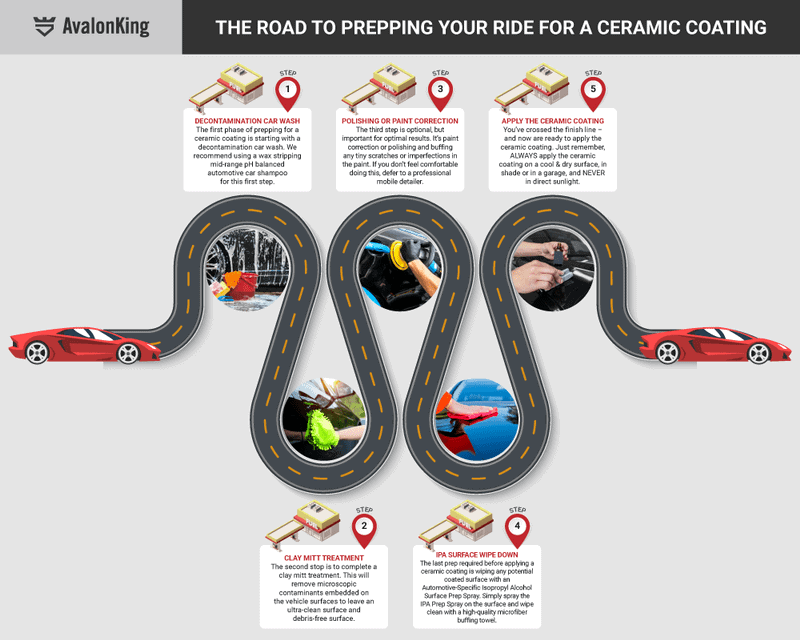
As the online market continues to be oversaturated with nano ceramic coating options, the chore of choosing the right paint protection product has become all the more time consuming and tedious.
However, settling on a ceramic coating with stellar reviews, and 9H-rated levels of scratch resistance protection is but one slice of the proverbial automotive pie. You need a ceramic coating that is going to last. A product that is going to look great, repel whatever touches it, and hold-up year after year.
But in order to get stellar ceramic coating protection and product longevity, one must first properly prep their vehicle. This not only ensures a smooth ceramic coating installation, but it also helps guarantee that the product can perform as intended.
Simply put: The stronger your surface prep, the longer your ceramic coating is going to last, and the better it will be at repelling contaminants.
In the following paragraphs, we’ll go over every step of the Armor Shield IX ceramic coating preparation process, explain the reasoning behind our methodology, and cover some additional insider “Quick Tips” and surface prep “Nerd Notes.”
Remember, DIY ceramic coating prep work is not optional… it’s mandatory. And here’s why…
Why It’s Important to Prep Your Vehicle Prior to Applying a Ceramic Coating

Washing a vehicle will only remove a fraction of the chemicals, waxes, and pollutant crap lurking on its surfaces. In order to truly deep-clean a car, and ensure that a ceramic coating is going to work, additional surface prep procedures must be implemented.
However, if you decide to skip the prep stage, and leave all of those surface contaminants and imperfections in place, a few unpleasant surprises will surface.
Straight out the gate, you will discover that your ceramic coating has not only locked all that crap sitting on the surface into place, but it has amplified its appearance as well. The second surprise, is that your crappy looking ceramic coating is not doing a very good job of repelling contaminants and moisture. This is followed by the realization that the product’s intended lifespan is unachievable, and that it requires replacement after a very short time.
In order for a ceramic coating to work, it must be allowed to fully bond with a surface, which is why prepping a vehicle prior to installation is such a detail-oriented and crucial procedure.
If that’s not enough to convince you that the ceramic coating surface prep process makes a difference, here are a handful of reasons why pre-installation sweat equity can mean the difference between success and catastrophe.
- Stronger nano-molecular bonds: Once fully cured, a nano ceramic coating turns into this super strong, completely invisible surface shield. By removing contaminants from a vehicle’s exterior, and fixing any blemishes, you create a blank canvas that the coating can properly bond with on a molecular level.
- Smoother surfaces: Contrary to common belief, automotive clear coat is anything but smooth. A quick glimpse through a microscope will show that your car’s clear coat is home to a vast expanse of peaks and valleys. Removing these microscopic peaks and filling those invisible valleys is what will allow a nano ceramic coating the room it needs to fill in the gaps afterwards, and thus create a truly smooth surface.
- Improved shine: Ceramic coatings produce a brilliant shine, especially if they are of a grade that can cure to 9H hardness levels. Being that whatever a ceramic coating adheres to gets locked into place, your shine will only be as resilient as the surface area beneath it.
Ceramic Coating Prep Product Essentials
While you may be tempted to crack open that box of Armor Shield IX that just arrived in the mail, and get right down to business, you can’t just charge in balls-to-the-wall.
Set some time aside, and draft-up an outline so that you have a plan of attack in place. The only way to attain optimum ceramic coating performance and longevity, is by putting in the appropriate prep work, and you don’t want to miss a critical step.
To accomplish this, we suggest starting off by procuring the following supplies, for these products will make every part of the prep process that much more efficient and effective.
- (2) Wash Buckets– The two-bucket wash method will cut down on cross-contamination during your initial car wash. More on this later.
- (1) Bottle of Ceramic Prep Car Shampoo– A high-quality ceramic prep automotive shampoo that does not contain waxes or polishes should always be at the top of your shopping list. Blending 2-ounces of this stuff with 2-gallons of clean water will help remove surface grime and older protective coatings like wax, and will help prevent the formation of hard water spots.
- (1) Microfiber Wash Mitt- In order to drench your car’s paint in suds, look for an extra-plush microfiber mitt with solid online reviews. The softer the mitt, the lower your risk of scratching and swirling the surface.
- (1) Clay Mitt or Towel- Unlike traditional clay bars, clay mitts and clay towels are 100% reusable, and do not need to be discarded if dropped on the ground.
- (1) Clay Lube- You can blend your ceramic prep shampoo with water to mimic a super-slick clay lubricant. That, or you could buy a pre-formulated clay lube from a retailer.
- (1) Spray Bottle of Isopropyl Alcohol (IPA)- Spraying an isopropyl alcohol solution onto a vehicle’s exterior and wiping it clean are a paramount final step in the ceramic coating prep phase. Check out the AvalonKing IPA spray blog article, as it explains why this stuff matters so much, and how to make your own blend.
- (5-10) Microfiber Towels– Microfiber towels allow you to dry, buff, and wipe away things like IPA and polishing compound residue. Always swap-in clean microfiber towels at each stage of the prep process to avoid cross-contamination, and swap in fresh cloths as they dirty.
- (1) Wax-Free Polishing Compound– Hitting the surface you are about to ceramic coat with a wax-free polishing compound will help correct any surface blemishes that may have been left behind after the initial rounds of cleaning.
- (1) Electric Polishing Tool- You could take your time and polish and buff the entire vehicle by hand. But who has that kind of time on their hands? Significantly speed the prep process up by using an electric surface polisher.
- (3-5) Polishing Wheels- You will need something to attach to the end of that electric polisher. We suggest grabbing a few polishing wheels, as they do eventually wear-out.
- (10) Microfiber Polishing Pads-To reduce the potential risk of swirl marks and scratches, you will want to use various grades of microfiber polishing pads, starting with the rougher stuff, and working your way down from there.
- (1) Garden Hose and Sprayer- If you don’t already have this basic household commodity, now is the time to buy. Both your flower garden and car will thank you. You can also use a pressure washer as long as it is set to its weakest setting.
The Ceramic Coating Prep Car Wash

Supplies obtained, it’s time to start the first part of the ceramic coating prep process: The two-buckets-and-a-beer car wash of extreme awesomeness!
While washing an automobile may sound like a self explanatory cleaning procedure, there is a sizable margin of error within this commonplace process. For more info on what might possibly go wrong, as well as details on the advantages of the two-buckets-and-a-beer approach, check out our article on how to properly wash a car.
That being said, here is an abbreviated rundown of the required steps for properly washing a vehicle prior to the application of a nano ceramic coating product like Armor Shield IX.
Step 1: Prewash/Rinse the Vehicle

The pre-wash, or initial rinsing of a vehicle plays a crucial role in the loosening and removal of dirt, debris, and other contaminants. To accomplish this, simply spray the entire vehicle with a pressure washer that’s been set on the lowest power setting, or use a regular old garden hose and sprayer.
Step 2: Prepare Your Wash Buckets

The two-bucket method requires taking two large buckets, and filling one of them with approximately 2-ounces of high-quality surface prep shampoo, and 2-gallons of clean water. The other bucket will be your “cleanse” bucket, and will be filled with plain old tap water.
Step 3: Scrub the Vehicle
After dunking your wash mitt in the bucket of shampoo solution, wash one section of the vehicle at a time. It’s imperative that you start at the top, and only work your way downward after all four upper sides, along with the roof of the vehicle have been scrubbed. Being that the lower areas of an automobile tend to be the filthiest, utilizing a “top-to-bottom” approach returns the cleanest results.
As you scrub, don’t forget to occasionally dunk your mitt in the rinse bucket before hitting the sudsy solution. With the mitt reloaded, work in an overlapping side-to-side motion, as this will eliminate the risk of circular swirl marks.
Step 4: Rinse Each Section Upon Completion

One of the primary causes of surface scratches, is by washing a car that has not been properly lubricated with water or soapy suds.
By rinsing each section as you go, you’ll keep the vehicle wet, and reduce the risk of hard water spots and soap from forming upon the surface. When you’ve finished scrubbing the entire vehicle, give it one last rinse for good measure before moving on to the next ceramic coating prep step.
Quick Tip: Stay away from the automated car wash if you enjoy your clear coat. We don’t give a shit what kind of cutting-edge cleaning technology or super soft bristle they have on deck. Drive-thru car washes are notorious for wrecking paint jobs faster than Forest Gump slams sodas at the White House, so steer clear of these contraptions if you know what is good for you.
Clay Media Decontamination

Once you’ve finished washing the vehicle, you’ll want to immediately proceed to the clay decontamination process. Taking full advantage of a freshly washed surface is only going help make the clay bar, mitt, or towel you are using that much more effective, so don’t go for a cruise just yet!
In order to successfully “clay” a vehicle, you’ll need to have a high quality car claying product, and a clay lube solution, which will both help lubricate the surface and expedite the decontamination process.
So grab some clay, lube-up, and let’s get it on!
Step 1: Prep the Clay Bar Lube

To make your own clay bar lube, take a clean bucket, and mix about 4-ounces (120mL) of high-grade car maintenance shampoo with around 32-ounces (950mL) of water. You will need a lube that is fairly slick and thick (insert Quagmire joke here… giggety…), so if it seems too watery, add some more shampoo to the mix.
Quick Tip: You can always use a spray bottle for applying clay lube, just make sure that the solution is not too thick, or it will clog the spray nozzle.
Step 2: Allow the Clay Media to Soak-up the Lube

One of the many reasons why we recommend using a clay mitt, or a clay towel over a traditional clay bar, is due to their ability to soak-up lube. Once allowed to soak (or be thoroughly sprayed), your clay media’s ability to effortlessly glide over surfaces and remove microscopic particles will increase exponentially.
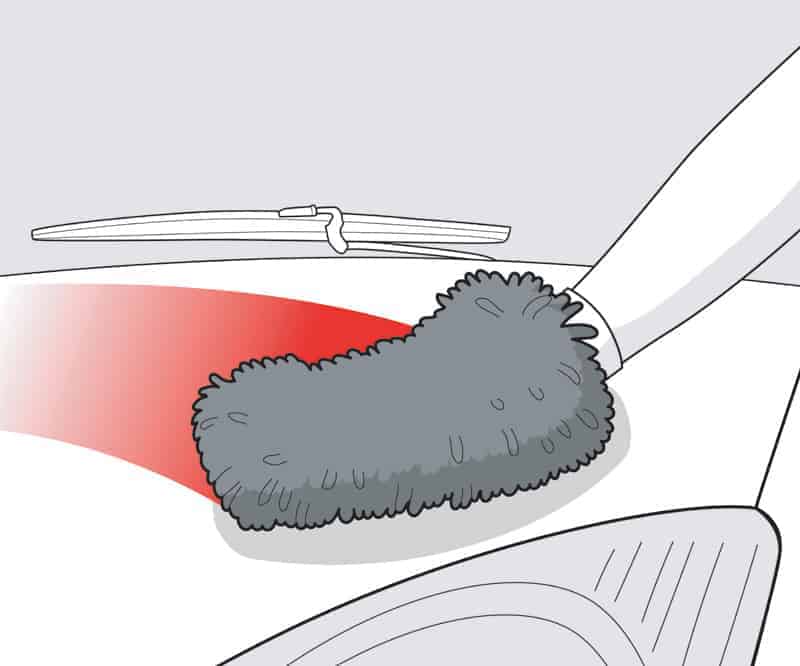
Step 3: Clay the Vehicle in Sections

Just like washing, you should always clay a vehicle in sections, being sure to not apply too much pressure, while utilizing a back-and-forth motion. When your clay media starts to feel dry, dunk or spray it with the lube, remembering to hit the surface with the slippery stuff as well. If you run out of lube, whip-up some more, being sure to keep the vehicle wet the whole time.
Step 4: Rinse, Inspect, Wipe, and Dry
After you’ve completed the clay media treatment process, and the entire vehicle has been touched, thoroughly rinse the automobile to remove any surface grime. Then, place a plastic sandwich bag over your hand and run it over all of those freshly clayed surfaces. This “baggy test” will amplify the feel of any surface you touch, so if one or two areas feel a tad rough, hit them with clay one more time before continuing your audit.
Once the baggy inspection yields a passing grade, rinse the car one more time, and thoroughly dry it off with an ultra-plush microfiber drying towel. Try not to work in circles, and stick with the side-to-side approach, swapping out the microfiber towel with a fresh one when it becomes overly saturated to cut down on streaking.
Quick Tip: If you need to remove car wax, an aging ceramic coating, or deeply embedded contaminants, reach for a ceramic coating surface prep shampoo. A higher pH soap will help lift surface debris and frail paint protection products, thus making the clay media’s job all that easier. For really tough jobs, increase the amount of prep shampoo in your lube solution, and cut back on the H2O for a far more concentrated form of attack.
3 Steps to Polishing and Paint Correction
Claying stage complete, it’s time to take a good look at your car’s clear coat and paint, and be brutally honest with yourself.
Does your vehicle’s paint look like it went bobbing for french fries face first? Has your car’s clear coat crapped its pants to the point where it requires a diaper change? Have swaths of swirl marks and surface scratches turned your automobile into a massive spider web on wheels?
If you answered yes to any of these questions, it may be time to complete a DIY paint correction procedure, or contract the job out to a professional.
For those of you who are unfamiliar with this topic, our in-depth article on the art of polishing and paint correction will shine some light on the subject. However, if you think that your car’s clear coat looks stellar as-is, feel free to skip this section, or move on to perusing the following simplified instructions.
Step 1: Apply Polishing Compound

In order to properly polish a vehicle, we recommend using a series of wax-free polishing compounds with various grades of grit coarseness. Always start with the roughest stuff, test it out on an inconspicuous area, and if you are happy with the results, polish one body panel at a time, graduating to a finer polishing compound after each completed pass of the vehicle.
Always work with a wet surface (time to break that sprayer out again), and to apply polishing compound in very thin layers. By keeping the vehicle’s exterior lubricated with water, and priming the polishing pad with a small amount of compound before applying it to a body panel, you will reduce the risk of damaging the clear coat.
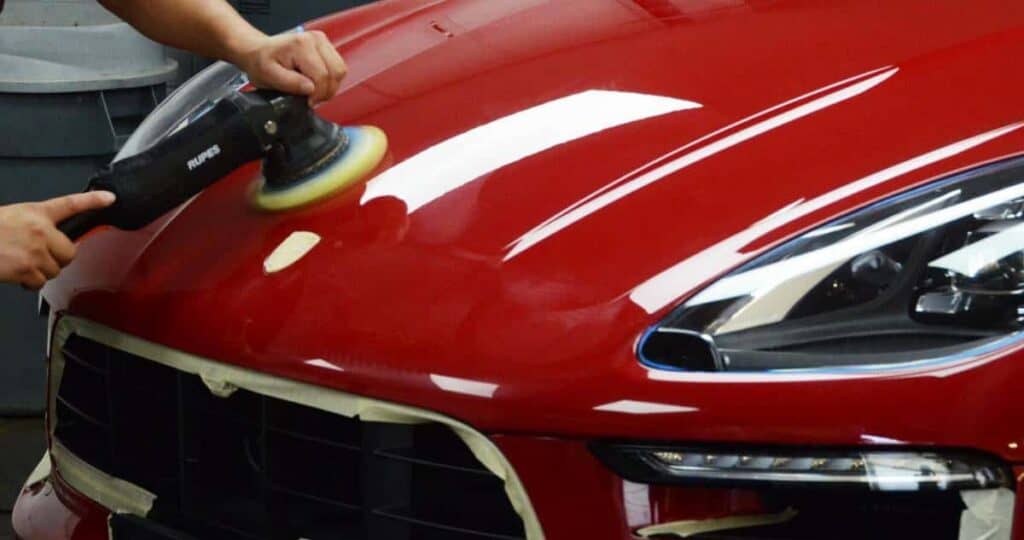
Step 2: Fire-up the Polishing Tool
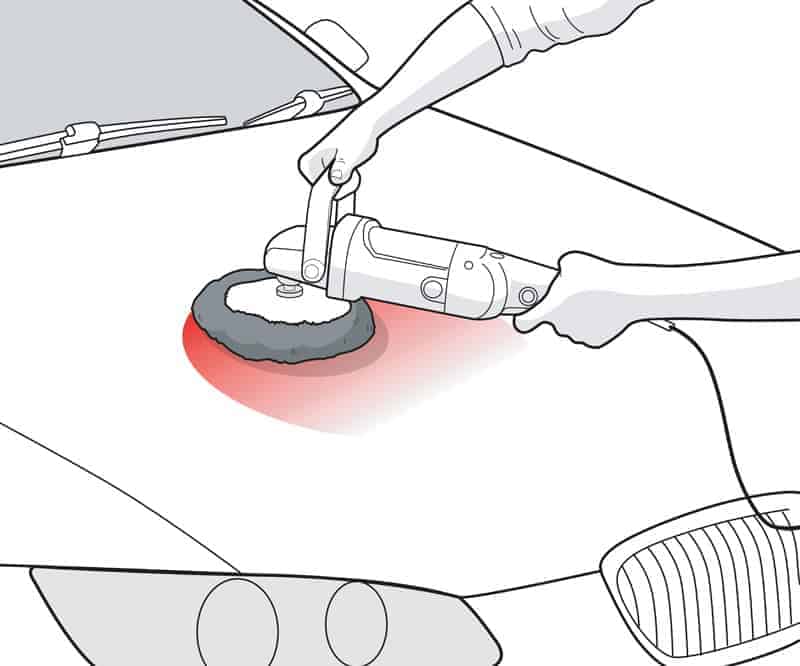
While a hand-held electric polishing tool is not necessary for completing paint correction procedures, it definitely speeds-up the entire process.
An electric polisher not only expedites the entire polishing and paint correction process, but it also has the ability to “reposition” and smooth-out a car’s clear coat. This not only helps hide scratches and swirl marks, but it also cleans-up things like oxidation and any stubborn contaminant residue that the claying stage may have missed.
Just be sure to purchase a sleeve or two of microfiber polishing pads in varying grades of roughness, always apply as little pressure as possible, and change out the pads the moment they begin to get dirty.
Step 3: Get Buff

The art of buffing an automobile has just as much to do with removing surface contaminants and polishing compound residue, than it does with creating a glossy surface. So take your time, allow the electric buffing tool room to work, and always have a back-up buffing pad (or two) on hand in case of contamination.
It may take a pass or two, but once all of that surface hazing from the polishing process has been whisked away, along with all of the residue it leaves behind, your ride is going to look a bazillion times better.
Apply an IPA Spray

The final step in any ceramic coating prep project, is the application of a blended Isopropyl Alcohol (IPA) solution. Hell, while you’re at it, you might as well crack open a cold IPA for yourself, because you have just entered the final lap.
The purpose of an IPA wipe-down, is to remove any invisible contaminants that may still be lurking on a surface. So be sure to read our article on how to blend your own IPA spray, and know that the following two steps are all that is required in the IPA wipe-down stage.
Step 1: Spray the IPA Prep Solution
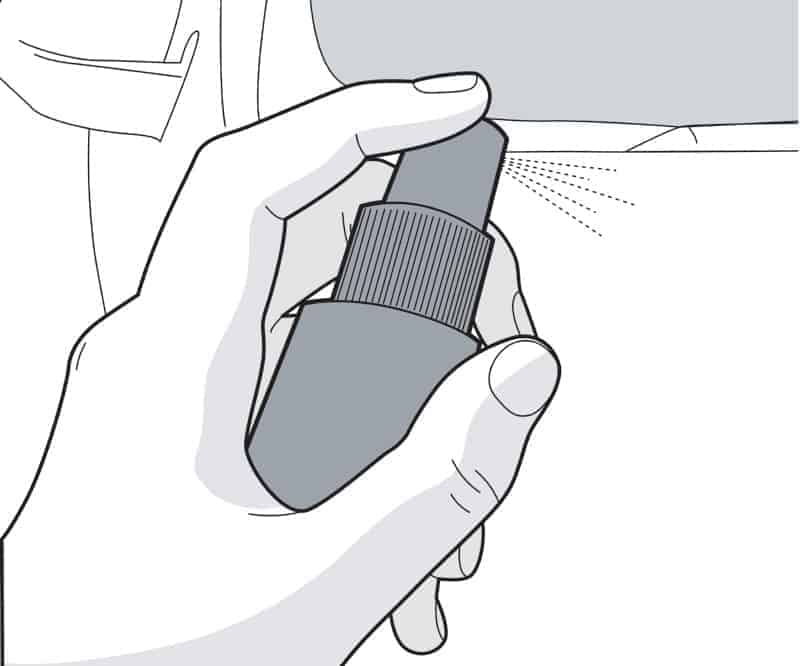
With the IPA solution blended, and the spray bottle set to its finest mist setting, begin spritzing one body panel at a time. A fine mist spray setting will not only help evenly coat the surface being cleaned, but it will also prevent you from prematurely using-up your IPA blend.
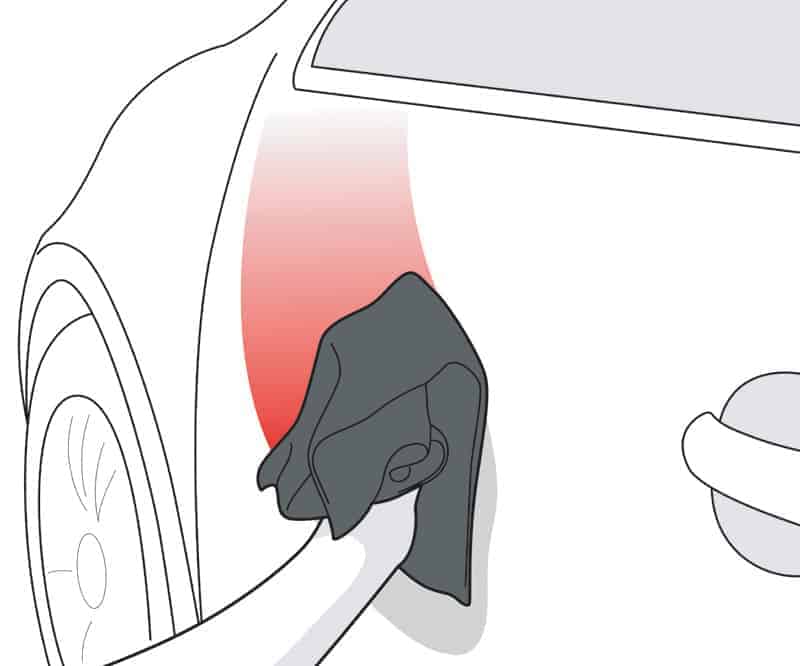
Step 2: Wipe the IPA Solution Away

The final step in the ceramic coating prep process is to wipe the car clean with multiple microfiber towels, hitting one panel at a time to ensure that the IPA blend does not sit for too long. As you go, replace any soaked microfiber towels to reduce streaking, being sure to always work in side-to-side straight lines.
Parting Shots

Now that you know how to prep for ceramic coating, a single key question remains: When the hell will you have time to undertake this lengthy DIY detailing procedure?
While an average weekday will rarely suffice, dedicating a couple of mornings over the course of a weekend typically provides plenty of time to prep a vehicle for ceramic coating. So look at your calendar, clear your schedule, and pencil-in that prep session.
Proper surface prep is more than just mandatory. It’s the single most crucial contributing factor in determining how well your ceramic coating performs, and how long it will last. So take your time, follow the appropriate steps, and make sure that you do it right the first time.
Whatever condition your car’s exterior is in when it gets ceramic coated, is what is going to be locked into place, and then amplified. So do that shit right the first time, and don’t hesitate to reach out to one of our badass customer service specialists if you have any questions or get stumped along the way.
Your super shiny, Armor Shield IX protected automobile is just around the bend, and we get a feeling that you are going to love the way that it looks and performs.


Comments (16)
Simply polish the car again, then apply the coating
Your extensive usage of the word “shit” doesn’t really enhance your credibility. What’s your deal?
I purchased a new truck that had minimal swirls. I washed, clayed and polished the truck to remove all swirls when I received it. Since then, I also applied Meguiar’s NXT 2.0 for surface protection. Three weeks later, I received my Avalon King Ceramic Coating! How do I remove the NXT 2.0 so that I can apply the ceramic coating?
The “prep kit” is going to vary from job to job.
it is going to depend quite a bit on the current condition of the car and what other products reside on the painted surface.
A basic prep would look like this:
1) wash and dry with a quality wax-free shampoo
2) strip/degrease the surface area if any waxy.
3) clay mitt/ clay bar
4) IPA wipedown.
After that you are ready to apply!
I am not sure I can see every product needed and I don’t want to miss any products. Can someone tell me if there is a kit that comes with everything together or what I need in my “prep kit”?
Hi Jerry!
You certainly can, however, it is fair that I warn you that buffing by hand is a labor of love. It’s intensively and quite the workout! If you don’t have the equipment to buff and your car is in need of paint correction I would recommend taking it into a detail shop.
Can I hand polish my vehicle as I do not have a buffer
Any recommendations?
any reason why no mention of no iron removal process ( spray) ? I believe both are just as important , car decontamination removal (clay bar or mitt) and Iron removal (spray) unusual done prior to the clay process…proper prep is everytime.
Also not noted, I will only a pre-wash soap( no waxes or gloss agents) during the Pre wash and the wash, add wax back to the process is pretty counter productive for this foundation process.
Hey what do I know….
When I read these post, I imagine the car enthusiast running out to Walmart to clear the isles of IPA so they can clean their car.
Please don’t do that.
To the OP, it would responsible of you to add a header in there asking folks NOT to use medical IPA for such projects at this time.
I believe there is higher concentration of IPA for industrial use, but I doubt that’s sold at local stores, hence my point that common doers will simply grab what they have immediate access to.
Thanks for the article btw!
Hi Dave!
I will send you a direct message with a possible detailer near you.