
Back in the day, removing embedded contaminants like bug guts, bird shit, tree sap, and road grime from a car’s exterior meant throwing a splash of turpentine on a shop rag, and hoping for the best.
If your toil paid-off, you were left with a relatively clean automobile, and a shit-ton of spider web surface scratches to go with it. Since automotive detailing clay bars, towels, and mitts were still decades away from being invented, removing paint impurities was a risky endeavor back in ye olden times.
Flip forward five decades or more, and detailing clay is everywhere. Yet despite its commonality, there’s still a lot of confusion surrounding automotive clay.
Here at AvalonKing we feel that it’s high time that someone set the record straight about automotive clay, and explain what it is, how it works, all that it requires, and why it matters so damn much.
There’s a reason why we we adamantly encourage every vehicle owner to first clay their automobile prior to applying a layer of Armor Shield IX, regardless of what condition it may be in.
So sit back, grab a beverage, and listen up, because properly clay barring your car can mean the difference between clean and protected, and faded and flaking.
What is a Clay Bar?

Clay Bars Are NOT Made From Clay
Contrary to its namesake, clay bars are not really made out of clay. Instead, they are made from a blend of man-made materials like polymer rubber and synthetic resins. Much like molding clay, this stuff is extremely elastic and absorbent, allowing it to be stretched or molded as needed in order to better contour to whatever surface requires claying.
Clay is One Contaminant Removing Badass
It is this ability to be molded that gives clay bars in particular a unique advantage, as they can be formed to fit within tight crevices. Regardless as to whether it’s a tightly rolled door seam or a completely flat quarter panel, the ability to snag microscopic contaminants makes automotive clay bars a must-have detailing tool.
The Different Grades of Auto Detailing Clay
Now it’s worth noting that not all clay bars are created equal. A quick online search will reveal a multitude of strength grades and styles, all being offered by different companies. Generally speaking, most clay products come lumped into two categories, each containing its own benefits.
Soft/Mild Grades
Soft/gentle grades of clay bar are designed to remove mild surface contamination. These products are generally reserved for light debris removal and routine maintenance. Milder clay bars are also ideal for removing things like pollen build-up, dust, contaminated rain, and hard water deposits.
Hard/Rough Grades
Rougher/harder grades of automotive detailing clay are reserved for removing deeply embedded or stickier debris. This grade of clay is ideal for prepping a surface prep prior to paint or the installation of paint protection product.
The problem with harder automotive clay materials is that they tend to be quite abrasive, and when used improperly, can strip-away clear coat and even damage paint. So unless you are familiar with advanced detailing best practices, it’s generally best to let the pros handle hard clay bar applications.
“It is very important to add a lot of
-Pan The Organizerlubrication… Spray a lot of it onto the surface, and then also on the clay media.”
Quick Tip: While many auto detailing product brands offer a proprietary spin on clay spray lubrication, many DIY enthusiasts create their own custom clay lube solution. In order to create your own clay lube, just add a sizable dose of low-pH car wash shampoo, and then carefully dilute it down with clean water until it becomes just watery enough that it can be applied via the use of a spray bottle.
A Little Clay Bar History Lesson

The Early Days of Clay
Earlier variants of today’s automotive clay products were created when a Japanese scientist by the name of Tadao Kodate began tinkering with resin encapsulated abrasives. However, it took quite a few years before Kodate-san had something that could be marketed and sold.
With the help of pneumatic tool inventor and auto detailing guru, Dennis Dehn, the entire world eventually gained access to the benefits of Kodate-san’s automotive clay in 1993. Kodate-san’s creation has since sold millions of units, paving the way for countless copycat companies and products.
Today, Kodate-san serves as the acting CEO at JoyBond, a clay bar company based in Saitama that only offers two products: A “Blue Clay” for minor decontamination scenarios, and a “Red Clay” for lifting things like paint overspray and deeply embedded brake dust.
Quick Nerd Note: To this day, JoyBond retains its claim of being “…the original manufacturer of Cleaning Clay bar for automotive detailing.”
Modern Day Clay Bar Variants

Nowadays, DIY devotees and pro detailers alike have access to a myriad of clay bar products, with every color and hardness level imaginable being offered. There are also cloth and mitt versions, which take all of the benefits of claying, and add an easy-to-hold and fold feature to the mix.
While detailing clay mitts resemble wash mitts and come packed with small, beaded synthetic clay materials for accomplishing the task at hand, cloth versions offer the same benefits.
These products rule at canvassing cracks and smoothing-out sharp edges. Many car care enthusiasts prefer these clay bar products, as they contour to one’s hand better, cover larger expanses in less time, and are less likely to slip or be dropped.
Another major perk to using a clay mitt or towel over a disposable clay bar, is that they can be used over and over again. Accounts of professional detailers using the same mitt on 30-50 different vehicles before swapping it out for a fresh one are not uncommon. So while mitts and towels may be a bit more expensive than traditional clay bars, you do get a lot more bang for your buck.
Quick Nerd Note: Automotive detailing clay bars are like bricks of soap in the penitentiary: You NEVER want to drop them. Once a clay bar lands on a sediment-covered surface like the ground, it’s pretty much game over, and you will need to go procure a new one. Clay mitts and clay cloths with wrist straps eliminate this risk, adding yet another perk to their long list of benefits over traditional clay bars.
A Close Look at How Auto Detailing Clay Works

The Lubed-Up Slip & Slide
As a clay contaminant removing product glides over a surface, any crud embedded within the area gets stuck in the super-soft, sticky substance.
In order for this to work, one must apply ample amounts of lube to both the surface they are cleaning, as well as the clay product itself. This will not only guarantee that the area being clayed gets scrubbed with a detailing solution, but it will prevent the clay bar/mitt/cloth from binding as it slides.
Playing Particle Pick-Up
As the clay contaminant removal tool absorbs dirt, pollen, brake dust, road grime, bird shit, tree sap, and all other form of crud, contamination becomes a concern.
Lubricate often, and flip or fold the clay product to reduce the risk of damaging the car’s clear coat. You don’t want the particles to dislodge from the clay and end-up back on the surface you are cleaning, which is why flipping and/or folding is a must.
Rubbin’ It the Right Way
When you use a clay bar treatment as recommended, all exterior components (outside of things like convertible soft top fabric roofs) are fair game. In fact, many professional detailers opt to use a detailing clay over polishing compounds and buffing wheels, as the risk associated with damaging clear coat is quite low with the automotive claying approach.
Prep for Ceramic Coating, PPF, and Other Surface Protectant Applications
The reason why it’s so crucial to use a clay bar prior to applying a nano ceramic coating, is because it removes most paint-destroying contaminants.
When you apply a ceramic coating (or any other form of protective product) over embedded debris, it has nowhere to go but deeper into the surface. This not only makes the contaminant far more difficult to remove, but opens the door to car killers like corrosion and rust.
Quick Tip: Automotive clay requires lube. LOTS of lube. This isn’t the slippery stuff you rub on your naughty bits when it’s time to get “experimental” in the sack, or the petroleum-based ooze that your automobile’s engine craves. Surface detailing lubricants are specifically formulated to help make things like automotive claying a breeze.
Selecting the Right Claying Products

Photo Credit: Pan The Organizer/YouTube
So you’ve decided that it might be time for a clay bar treatment, and that you do indeed have the physical and mental aptitude to complete the task of detailing your own car. Well congrats compadre, you are now one step closer to automotive supremacy. But before you begin, it’s time to do a little shopping.
Whether you prefer to shop online or at the local hardware store, you will find that the average slab of automotive clay tends to be quite affordable. While it may require disposal after just one use, a clay bar only has to be used on an annual basis, so a small bar is oftentimes more than enough to clean a vehicle.
Clay mitts on the other hand, may cost a bit more, but are easily justifiable due to their perks. Just be sure to get something that fits your hand, and don’t just opt for the cheapest product on the shelf.
As for choosing a clay lubricant, options abound. While manufacturers will insist that you “must” use their specific lubricant formula to achieve optimum results, tests have proven that the majority of the higher-end offerings all perform equally well.
Quick Tip: You will also need some ultra plush microfiber towels for wiping everything down when you are done, so don’t skimp on quality here unless you want to see scratches on your freshly decontaminated clear coat.
How to Use a Clay Automotive Detailing Product

All of the necessary products procured, it’s time to get claying. To help illustrate this process, here are some of the core steps for clay detailing a vehicle.
Step 1: Wash & Dry Your Vehicle

Using the time proven, two-buckets-and-a-beer car wash cleaning method, thoroughly scrub, rinse, and dry your vehicle. This completes the first, and arguably most vital step of the claying process, as it removes the majority of the dirt and surface debris from the vehicle, and therefore expedites the entire endeavor.
Step 2: Gather Your Goods
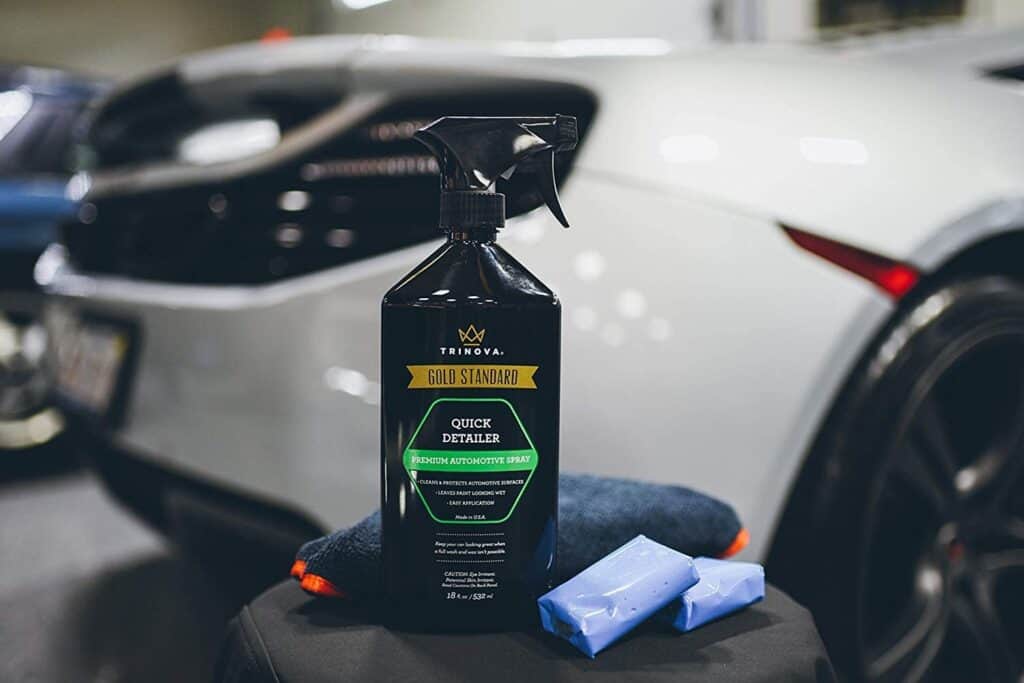
Photo Credit: TriNova
When it comes time to get your shit together, your clay decontamination kit should look something like this:
- (1) Clay bar, clay mitt, or clay cloth
- (1) Bottle of clay bar lubricant
- (1-3) Ultra-plush microfiber towels (for drying when you’re done)
- (1) Plastic sandwich bag for quality control (seriously)
Step 3: Pick a Starting Point

Clay bar treatments are best completed in sections, which means tackling one body panel at a time. Many people prefer to start with one quarter panel or fender of the vehicle, and complete sections in a circular pattern. Once you come back to the original starting point you can move-on to areas like the roof and any exterior additions like brush guards and roof racks.
Step 4: Apply the Lubricant
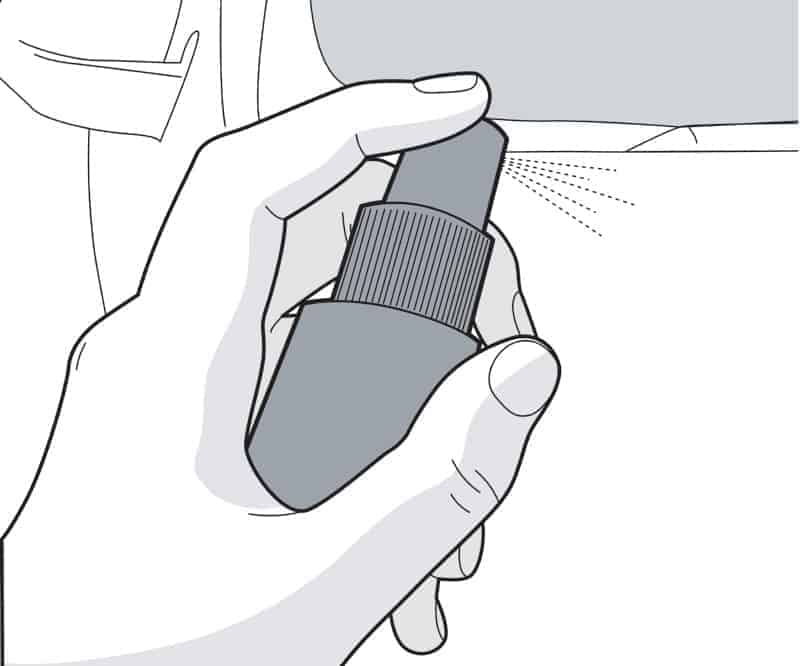
Apply a liberal amount of lube to both the surface area you will be claying, as well as the clay product itself. This stuff is inexpensive and can spell the difference between a decontaminated vehicle and a fucked-up clear coat, so don’t skimp on its application.
Step 5: Begin to Clay the Vehicle

Once the surface area is properly lubricated, you’ll begin to gently glide the claying media back and forth over clear coat. If you feel the clay stick to the surface, don’t worry, this means the decontaminating media is doing its job. As long as there is enough lube in place you have nothing to fear. Once the clay begins to slide fluidly over the surface that you’ve scrubbed, move on to the next area, until the entire vehicle (glass included) has been clayed.
Quick Tip: NEVER clay a surface in a circular motion, as it may create swirl marks and easy-to-see scratches.
Step 6: Check Your Work

Once the entire vehicle has been clayed, it’s time to check your handiwork. This is where that plastic sandwich bag comes in handy, as it will help you determine whether or not your efforts have paid off.
A plastic bag serves as an “amplifier” of sorts, allowing the nerves in your hand to indicate whether or not any lingering debris or contamination are still present. If you find that there’s a rough spot somewhere, hit the area with some lube and clay over it once more until smooth.
Step 7: Rinse the Vehicle & Dry

Photo Credit: Wilson Auto Detailing/YouTube
Once you’ve completed the claying procedure, finish the job by rinsing and drying the entire vehicle. This will help remove any lubricant residue or loose particles that the process may have pushed around.
After that, hand-dry all surfaces with a clean microfiber towel in order to reduce the risk of unsightly water spots.
Quick Nerd Note: One of the biggest perks to using a clay cloth or clay mitt, is that they can be cleaned. Unlike traditional clay bars, which must be discarded if dropped on the ground, clay mitts and clay towels can continue to be used after a quick rinse.
Automotive Clay and Ceramic Coatings

Photo Credit: Wilson Auto Detailing/YouTube
While today’s clay decontamination products come in a wide array of colors and compound structures, they all serve the same purpose: To safely remove stubborn and invisible debris from surfaces.
Forget all of the gossip about clay bars being little more than late night infomercial snake oil. This shit works, and it works extremely well. This is especially true when preparing a surface for the application of advanced paint and glass protection products, like a nano ceramic coating, or a paint protection film.
Quick Nerd Note: Once a surface has been ceramic coated, it is best to avoid claying, as it may weaken or even remove the protective seal. This is why the process of ceramic coating removal typically involves a harder grade of clay, as it does a damn good job of scraping-off the old coating.
Parting Shots

Photo Credit: LaCuraDellAuto.it/Facebook
Using automotive clay media to deep clean a vehicle’s exterior surfaces is an easy and inexpensive way to remove contaminants, and should be a core part of everyone’s annual spring cleaning routine.
By sticking with a consistent debris decontamination routine, you will not only remove potentially harmful crud from your car’s exterior, but provide it with a smooth surface that is ripe for protective coatings. Oh look! A fresh shipment of Armor Shield IX nano ceramic coating kits just arrived. How fortuitous…


Comments (4)
Okay… I’ve been looking around lots but to straight answer to this question…
Can clay remove rust spots created after a ceramic coating without damaging the Ceramic coating?
Here’s what I mean… Bought vehicle in Feb 2020… paint corrected and coated it May 2020… winter 2021, started noticing tiny rust spots mainly all over doors. I can scratch them off with my finger nails but, there are way too many to handle like this…
So, the question is, would a clay bar/sponge get rid of these rust spots without removing the ceramic coating? And, if so… what would the procedure be?
I also read in a forum from 2018 that there was a sort of Clay Bar for ceramic coatings, is that a real thing?
Thanks for the advice in advance
Hi Alex!
I wouldn’t recommend claying on top of a ceramic coating unless you are preparing to remove the coating itself.
What is your recommendation regarding clay bar treatment after the ceramic coating has been done? Would claying be detrimental to the coating or is there a minimum amount of time to wait? Thanks!
Can it cause swirls to show on hood paint? Under bright lights?