![[EXPLAINED] How Much Does Ceramic Coating Cost and Is It Worth It?](http://avalonking.com/cdn/shop/articles/97F438FD-8651-4107-8C5E-F0EC1A1A094F.jpg?v=1651076367&width=480)
Enter the garage, where we will address the topic of interest: "Is Ceramic Coating Worth the Cost?" You've come to the correct spot if you're a do-it-yourself enthusiast trying to streamline your car maintenance routine.
Let's keep it real – car care can be a maze of options! Picture us as your friendly garage buddy, giving you the lowdown on whether investing in ceramic coating is right for you.
So, here's the deal: Ceramic coating is like the super shield for your car, adding shine and protection. But we get it – you want simplicity. That's why we're here to tell you, "This is the only one you need."
Stick around as we discuss whether the ceramic coating cost is worth the investment for a DIY maestro like yourself.
Spoiler alert: Your car might thank you with a gleaming smile.
Here's the rundown from Future Market Insights: The ceramic coating market is growing, eyeing a 7.6% annual growth from 2022 to 2032. They're predicting it could reach a massive US$ 21.82 Billion, with the current market revenue sitting at about US$ 10.49 Billion. That's the market talk!
Factors Affecting Ceramic Coating Cost
Let's face it: a well-protected ride is a happy ride. So, grab your tools, settle into the garage vibe, and explore the factors affecting the cost of ceramic coating.
Size and Type of Vehicle
Alright, let's start with the evidence – size matters! The bigger the vehicle, the more ceramic coating material you'll need. So, whether rolling in a compact car or cruising in an SUV, factor in your vehicle's size when budgeting for that ceramic glow.
Duration and longevity of the ceramic coating
Now, let's talk about the longevity game. Different ceramic coatings offer different lifespans. It's like choosing between a quick joyride and a cross-country road trip. Consider how long you want that glossy finish to last before requiring a touch-up.
Additional services such as wheel and windshield coating
Have you ever thought about pampering your wheels and windshield, too? Additional services like coating your wheels and windshield can add to the cost. Think of it as giving your car the VIP treatment. Why not? It deserves to shine from top to bottom!
Paint condition and level of paint correction required
Have you got a few battle scars on your car's paint? No worries! The current state of your paint job and the level of correction needed can impact the cost.
Location and quality of the service provider
Location matters! In detail, where you get your ceramic coating done matters. Quality service providers may charge a bit more, but consider the expertise of the people wielding the ceramic skills.
Estimating Ceramic Coating Cost
Have you ever wondered about the key behind a vehicle's mesmerizing ceramic-coated glow? Today's the day we run through the mysteries of estimating the cost of ceramic coating.
Average cost range for different vehicle sizes
So, here's the scoop on giving your car that shiny armor – ceramic coating. Getting your vehicle coated now comes with a starting price tag of $1,100, but let's explain why.
Ceramic coating is a time commitment, taking around 15 hours to work its magic on all exterior surfaces.
Now, let's not sugarcoat it – this spa day doesn't come cheap. The product cost alone can quickly soar past $150. The results are worth it – consider it an investment in that gleaming, well-protected exterior.
| Ceramic paint coating | $600 |
| Ceramic glass coating | $200 |
| Ceramic wheel coating | $200 |
| Ceramic trim coating | $100 |
How much do ceramic coatings cost on an SUV?
Let's talk about giving your SUV that ceramic coating glow – it starts at $1,300. So, you might wonder why it's a tad pricier than coating a regular car. Well, blame it on the size! SUVs need more attention; we might even need a platform or ladder to reach that towering roof.
Now, what time does it take to coat an SUV? Buckle up – it's around 18 hours if we deal with minor paint issues. But if your SUV's paint needs severe TLC with scratches and swirl marks partying on the surface, it's a whole new ballgame.
We're talking compounding and polishing, which can jack the price by $250 or more.
| Ceramic paint coating | $750 |
| Ceramic glass coating | $200 |
| Ceramic wheel coating | $200 |
| Ceramic trim coating | $150 |
How much does a ceramic coat cost on a truck?
Let's look at the ceramic coating for trucks – starting at $1,450. Now, trucks, especially those full-size pickups, demand more attention and a bit more coin.
If you've got a new truck or one with just light scratches and swirls, the ceramic coating gig will take around 20 hours.
Not too bad, would you say?
The catch, though, is that if the paint on your truck has been neglected and needs major compounding work, it might cost an additional $300 or more to restore its excellent appearance.
| Ceramic paint coating | $900 |
| Ceramic glass coating | $200 |
| Ceramic wheel coating | $200 |
| Ceramic trim coating | $150 |
Breakdown of cost components (labor, materials, prep work)
- Car wash stuff ($70-100): Start with a good wash. There is no need to spend a fortune; get the basics for a clean slate. Go for AvalonKing's ceramic prep shampoo for powerful cleaning - the first step in your ceramic coating process.
- Clay bar/mop ($30): Think of it as a magic eraser for your car. It's not just any bar; it takes out the stubborn stuff.
- Polishing gear ($150): Time to make that car shine bright. These supplies are the ticket to a showroom finish. Use ARMOR SHIELD IX for a pro shine and glossy finish. It's a super-easy DIY, all-in-one kit.
- Isopropyl Alcohol (IPA) Prep Spray ($10): This is like the final touch. A quick wipe and your car is all set for that ceramic goodness. Choose ARMOR SHIELD LITE for protection, shine, and easy application. It's budget-friendly with hydrophobic properties.
We're cracking the code on affordable ceramic coating because, let's face it, who doesn't want a sleek ride without burning a hole in their wallet? We have some tips to make your ride shine without breaking the bank.
Shop Around
Channel your inner bargain hunter and shop around. Don't settle for the first offer that comes your way – explore your options. Think of it like searching for the perfect tool in your garage; you wouldn't grab the first one you see, right? Here, the same idea holds true. Examine several suppliers, evaluate costs, and choose the most economical option for your spending plan.
Looking out for discounts or promotional offers
Who doesn't love a good discount? Keep your peepers wide open for promotional offers or discounts. It's like stumbling upon a hidden gem in your garage – that feeling of discovery. Many service providers run specials, especially during certain times of the year. Keep tabs on newsletters, social media, or local car enthusiast forums for exclusive deals.
Negotiate with service providers
Time to put on your negotiation hat! Feel free to place your negotiation with service providers. Similar to adjusting an engine, negotiating can yield satisfying results but may require some skill. You might be shocked at the kind of compromise you can achieve if you express your worries about your budget. Recall that you should get a great deal because it's your car.
PROS OF CERAMIC PRO INSTALLATION
- The Minimalist Option: When you have the pro installer complete this project for you, it’s the ultimate minimalist effort. Simply drop off the vehicle and pick it up when they are done.
- Different Warranty Options: The ceramic pro option comes with multiple levels of warranty options. Consumers can opt for the warranty grade that fits their needs and budgets best.
- Superior shine: Professional nanoceramic coatings often produce elegant shine and hydrophobic properties.
CONS OF CERAMIC PRO INSTALLATION
- Expensive: Comparing ceramic pro products to DIY isn’t really fair, but it’s a reality. Most of these packages range from $1,000 to $2,500 based on the product, how many applications, and years of protection.
- Questionable Warranties: Some pro installers are better than others. Always verify the facts and terms of any warranty – and get it in writing before opting for the pro-grade.
- Extra upkeep requirements: Most of the professional-grade coatings require the use of specific paint protection or upkeep products, or monthly – semi-annual visits to their facility for detailing, which cost extra.
PROS OF DIY CERAMIC COATINGS
- Less Costly: It’s estimated that a high-quality DIY nano-ceramic coating will cost about 90% less than the best ceramic pro option.
- Superior Hydrophobic Properties: DIY ceramic coatings can produce exceptional shine and hydrophobic properties.
- Similar length of service: On average, the professional and DIY products offer the same level of protection for the same length of time.
- You feel better about doing it yourself: Well, this is the primary reasons why consumers opt for the DIY solution.
CONS OF DIY CERAMIC COATINGS
- It takes effort to prep the vehicle: Positive results are typically generated based on the prep work completed. The quality of your paint surface will mainly determine how much prep work will be required.
- Not for all cars: If your paint’s clear coat is thin, a DIY ceramic coating is not going to help much. It’s really intended for newer cars with quality clear coat finishes.
- Some really cheap products on the market: The DIY coating segment is packed with inferior products with over-exaggerated claims, so do your research before you purchase.
DIY vs. Professional Cost Comparison
Today, tackle the age-old debate: DIY vs. Professional car care. Whether you're a DIY diehard or thinking about outsourcing the sparkle, we've got the lowdown in the simplest terms possible.
DIY Implications
- Cost savings: Let's talk green – the DIY route often means more dollars in your pocket. You're not paying for professional labor, so those hard-earned bills can be redirected to other garage adventures.
- Time investment: Time is money, they say. DIYing your ceramic coating means investing time, but consider it a weekend project. Turn up the tunes, grab a cold one, and make it a car care in your garage.
- Learning curve: Every DIY project has a learning curve, but fear not! It's like mastering a new tool in your collection – a bit of practice, and you'll be a ceramic coating maestro.
Pros and Cons of Professional Services
On the other side, here comes the justification for what you'll get and face with professional services.
Pros:
- Professional finish: Offers a polished, professional-grade finish that can be challenging to achieve with DIY methods.
- Time efficiency: Professionals are experienced and efficient, completing the job in a shorter timeframe.
- Expertise and equipment: Access to professional-grade equipment and expertise ensures a high-quality application.
Cons:
- Higher cost: Professional services come at a higher price due to labor and premium materials, making them less budget-friendly.
- Limited involvement: Limited hands-on involvement for car owners who enjoy being part of the detailing process.
- Scheduling dependence: The process might depend on the service provider's schedule, potentially causing delays.
How Does the Cost of Ceramic Coatings Compare to Other Sealants?
We mentioned above that consumers have multiple paint protection products. While many of them do a great job protecting the surface area of materials, some are more effective than others. Here are the general contenders to consider for paint protection or sealant.
Car Wax – About $40 Per Year

In the beginning, there was carnauba wax, a natural-occurring product that is derived from palm trees grown in Brazil. Car Wax is designed to provide protection against exposure to UV rays, contaminants, and other debris. Polish helps to improve the luster or shine of the clear coating.
- Car wax provides car owners with several advantages.
- It’s easy to use
- Cheaper than other products
- Simple to maintain and store
- You can combine it with polishes and other paint sealants
- Easier to remove
However, there are some areas of concern to consider.
- Doesn’t last very long
- Traps dirt and debris
- Not good at protecting against chemicals
- Only lasts a few weeks
Paint Sealant – About $60 Per Year

Paint sealant is basically a synthetic car wax on steroids. It is applied the same way but tends to provide up to six months of protection. There are some advanced formula’s that can last a year.
Paint sealant is a synthetically engineered liquid product that has been lab-created to adhere to the paint clear coat and provide a thin layer of protection. It’s usually a combination of ‘wax’ and polish.
Some of the top benefits of using a paint sealant to keep your clear coat protected include:
- Is easy to apply
- Works well with car wax and polish
- Makes the car appear glassy and wet
Although paint sealants can last up to six months, they also come with some negative features:
- Shows paint imperfections
- Requires more prep work than wax
- Difficult to remove
- Provides a medium level of paint protection
Paint Protection Film or PPF – Up to a Few Thousand Dollars

Paint Protection Film or PPF as we’ll call it going forward is the upper echelon is paint protection products. It’s a space-age technology product that was initially invented by PPG and used to protect helicopter blades from damage during the Vietnam War. It evolved from those early days into an exceptional protection product.
PPF is a thin vinyl product that is clear and installed on the vehicle’s surface. Most car owners will apply PPF on the front bumper, hood, side-view mirrors, and other front area sections that tend to be hit by debris. Some folks will apply it on the entire vehicle.
The paint protection film is installed by a professional detailer or an automotive vinyl expert. When it’s applied correctly and maintained, it offers consumers multiple benefits:
- Exceptional protection against rock chips
- Incredible self-healing properties
- Virtually scratch-proof
- Can last for 10 years
PPF is a great paint protection product, but there are some things you should consider before making the investment. Oh, and here is a bit of clarification – IT’S NOT FOR ALL PPF PRODUCTS.
There are some that are higher quality than others, so these CONS are for the cheaply made products still in circulation in some countries.
- PPF is the most expensive paint sealant or protection option as they are typically applied by professionals, and the cost of goods is higher due to the advanced technology and longevity.
- Not as hydrophobic as Ceramic Coatings. While many new PPF products have improved recently with hydrophobic properties, they are not as good as ceramic coatings. This is why many professional PPF installers recommend applying a quality ceramic coating on top of the PPF for better results (and usually offer this service).
- When damaged, requires replacement.
- Some cheaply made PPF’s can still discolor. Yeah, there are still some really crappy made PPF products made, that can discolor over time due to excessive exposure to UV rays or contaminants. WHILE THIS IS VERY RARE it’s still possible. So, make sure to buy a high-quality PPF to avoid this potential.
What Do You Need to Consider Before Doing Ceramic Coating Yourself?
If you’re about 90% ready to purchase a high-quality DIY ceramic coating kit, there are a few important items to consider, that will help you reduce mistakes, and produce quality results.
First – Make Sure Your Paint is in Good Condition

The quality of paint makes a huge difference when applying a ceramic coating. Anytime you are planning to invest in a nanoceramic coating product, it’s important to start with examining the current condition of the paint.
A common myth about ceramic coatings is they improve the quality of paint. This just isn’t true. In fact, when there is paint damage like swirl marks, scratches, faded paint, and stains caused by bird shit and bug guts, the coating will amplify these imperfections – not hide them.
That being said, if you have damage to the paint, you should either have paint correction completed by a professional detailer, do it yourself, or consider a new paint job or new vehicle.
We wrote a really detailed article about DIY paint correction, which we highly recommend reading if you’re considering doing this yourself. Once you have, determine if you feel comfortable doing this yourself. Otherwise, start looking for a local professional car detailer or auto detailing company who can handle this for you.
Second – Consider your Paint Protection Options
When the paint is in good condition, you’ll need to consider all of your paint protection options. While we strongly believe that ceramic coatings like our Armor Shield IX is a great deal, it is not for everyone.
Before you spend money on any paint protection method, complete the research needed to ensure you’re making a smart investment. Weigh the pros and cons of each one, along with the financial and time investment needed to successfully apply and maintain each.
We wrote a detailed article comparing all four of the common paint protection options for you to review.
Third – Consider the Different Types of Ceramic Coatings
By now, you’ve either determined to go full throttle into the ceramic coating game, or you’re going to choose paint sealants, car wax or a PPF. If you’ve made the coating decision, awesome! We think you’re making a good choice.
However, there are several types of ceramic coatings out there.
Professional Coatings

Ceramic pro products will run you anywhere from $500 to $3,000. However, this is just for the coating itself. Most of the time, pro coated products require paint correction to honor warranties – and of course, to be completed in-house. While they tend to last a long time with exceptional results, always consider the financial pinch associated with this option.
DIY Ceramic Coating
The other option is the do-it-yourself ceramic coating. The main difference between DIY and pro-grade stuff is that the DIY coatings are specially formulated for easier application. I would recommend reading more about these two products, to help you understand all the variables involved. This article is quite helpful when choosing between professional ceramic coatings and DIY ceramic coatings.
Fourth – Complete a Cost Analysis

If money wasn’t a consideration, I’m certain we’d all be driving around in Bugatti’s with full custom paint jobs, vinyl wraps, or PPF that is covered in ceramic coating. However, money is always a factor. This is why the next item to consider when you’re thinking about a ceramic coating is weighing the cost.
I wrote a rather in-depth article breaking down all of these factors including cost, which you should read. Click this link to break down the true cost of ceramic coatings.
What Are the Best Ceramic Coating Kits?
There are several ceramic coating DIY kits on the market. Some of them good – some meh, and some that flat out just doesn’t cut the mustard. However, pound for pound, and according to consumer reviews, and that from professionals in the industry, Armor Shield IX is among the best ceramic coating kits available.
But what makes Armor Shield IX so much better than others? Well, there are several reasons why our DIY nanoceramic coating kit is head and shoulders ahead of the competition.
The Quality of the Product
We mentioned above that the best DIY ceramic coatings are slightly revised versions of professional-grade coatings. They are designed for an easier application while producing similar longevity and paint protection results.
This is what we did with Armor Shield IX’s formulation. Our DIY ceramic coating contains a SiO2 percentage of slightly more than 80%. But, it’s not too quartz-rich to make it difficult to install.
In fact, according to many consumers and professional detailers, Armor Shield IX is one of the strongest ceramic coatings available on the market today – even compared with some pro-grade products.
User-Friendly
While strength and the quality of the product are essential for superior protection, if it’s hard to apply for DIYers, it’s a waste of time and money.
Armor Shield IX was developed to empower the average car consumer to apply a professional, high-quality ceramic coating themselves, without needing a Master’s Degree in Engineering or automotive technology.
We formulated this DIY nanocoating to be easy to apply and maintain. In fact, the hardest part about applying Armor Shield IX usually breaks down to the prep work. The video above does a great job showing how user-friendly our product is to apply and use.
What’s in the DIY Ceramic Coating Kit
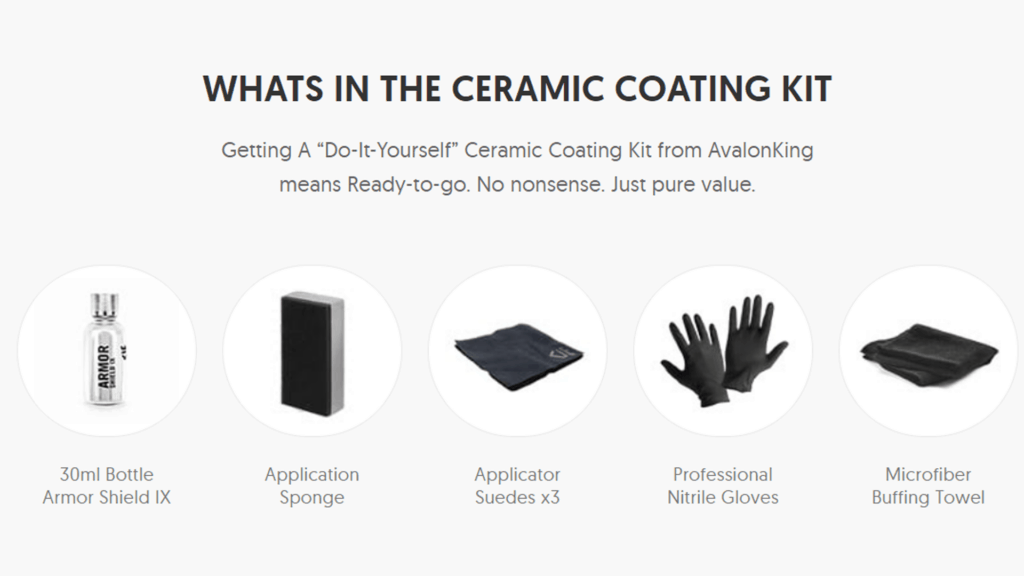
Product quality, user-friendly installation and use are important factors for choosing the best DIY nano quartz coating. However, if you don’t have the right supplies needed to complete the task, it’s pretty much pointless – right?
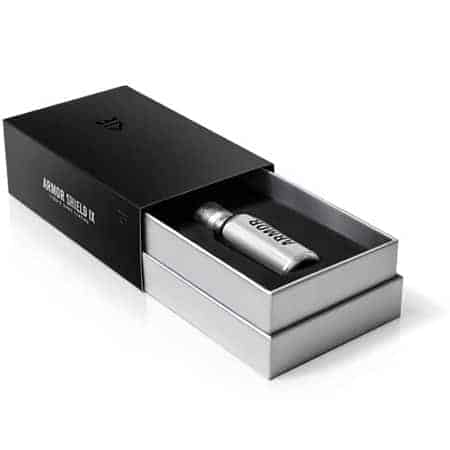
The Armor Shield IX consumer kit comes with EVERYTHING you need to correctly apply the product.
- (1) 30ml bottle of Armor Shield IX Ceramic Coating (This is enough for the average-sized car or motorcycles) 2 bottles are needed for sedans and crossovers, while 3 should take care of full-sized trucks and SUV easily.
- Application Sponge – this provides a strong yet flexible flat surface for smooth and consistent application (even on rounded corners).
- Applicator Suedes – you’ll wrap the suedes around the sponge, then apply the coating on the suede for application. You should change out the suedes if the coating gets ‘hard’ on the surface, which is why we include (3) per kit.
- Professional Nitrile Gloves – Armor Shield IX isn’t hazardous to your health. But we don’t want you to get sticky stuff on your hands.
- Microfiber Buffing Towel – after you apply the coating, you need to buff it off. The high-quality microfiber buffing towel is perfect for accomplishing this crucial vital step.
Customer Support

Any time you are using something new, it’s important to have a reliable source to ask questions and seek advice. That’s the name of the game here at AvalonKing. Our customer service game is strong. In fact, it’s one of our biggest differentials that elevates us from our competition.
We not only provide detailed, illustrated instructions in each Armor Shield IX ceramic coating kit, but when customers ask us questions – we’re quick to reply. Simply review the comments from REAL CUSTOMERS on our product page.
Additionally, our social media engagement game is on-point. When you have questions or concerns addressed through any platform, we’re here to provide factual data and answers you need.
Two Year Warranty
We believe in the quality of our product. In fact, we stand by this by offering a two-year expected longevity warranty – something our DIY coating competition simply doesn’t offer. We also offer a 30-day easy return (in case you have buyer’s remorse or second thoughts), and ONLY sell our product through our safe and secure online shopping platform.
When you break it down simply, a ceramic coating on your car is definitely worth it. If you have any questions about the information posted in this article, or about ceramic coatings for DIY consumers, comment below, or contact us directly.
Frequently Asked Questions (FAQs)
Here’s a rundown of the top FAQs regarding ceramic coating costs.
How much does a ceramic coating cost for a truck?
Ceramic coating for a truck usually costs between $1,100 to $1,650, influenced by factors like truck size, chosen coating type, and optional services like paint correction. Larger trucks may have higher costs due to more materials and labor.
How much does PPF and ceramic coating cost?
Let's face the fact that combining Paint Protection Film (PPF) and ceramic coating costs between $600 to $8,000 (for new installations) or typically $1,100 to $2,200 for an average PPF package—vehicle size, coverage extent, and the chosen ceramic coating influence the cost.
How much does paint correction and ceramic coating cost?
Depending on factors like vehicle size and correction needs, paint correction and ceramic coating typically cost between $1,000 to over $3,000. Larger vehicles may have higher costs due to more materials and labor.
Conclusion
Let's wrap up our garage talk on whether the ceramic coating is worth the cost. Simplifying car care is vital, and we've been keeping it as straightforward as changing oil.
So, is ceramic coating worth it? Picture this: you apply it once, and your car gets a shiny shield that lasts – no fuss, no constant upkeep. It's magic for those who love a low-maintenance but high-reward approach to car care.
Go ahead and give your vehicle that shiny, protected result. The cost might be upfront, but the long-lasting shine and protection? Priceless. Here's to simplified car care and rides that gleam effortlessly – because, in the end, that's what it's all about.


Comments (1)
I like how you mentioned that applying a ceramic coating on your car is a proven method for protecting paint, glass, rims, and even headlights. Personally, I spend a few hours a few times a month detailing my truck since I like to have it nice and sharp. Thanks for helping me realize how ceramic coating can help my truck to look clean every day.